
When scrolling through a website, you surely noticed that certain elements would stay in the same place as you are scrolling down. Those are called sticky elements, and you can make any part of your website sticky. But, there are certain elements that web developers usually make sticky, like a sticky menu or a sticky header.
But, what is a sticky menu? A sticky menu is a part of your website that will stay in the same place as the audience is scrolling through the website for faster navigation. And what is a sticky header?
A sticky header is the top part of the website that usually has the name in it with some other important information or even a menu where you can log in or sign up for a website that will move along as you scroll down to make the actions easier.

Sticky elements can have relative and fixed positions, meaning that if they have a relative position, they will stay fixed until we reach a certain spot where the element stops being sticky.
If you want to make sticky menus and headers yourself, there is a lot of information online on how to do it, and one of the most common ways is coding. The instructions are below, and if you want to expand on this, you can find more info here.
Here is the exact code, and please note that this code will not work on Internet Explorer or Edge 15 and earlier versions. The code is written below:
div.sticky {
position: -webkit-sticky; /* Safari */
position: sticky;
top: 0;
}
But, there is an easier way to all of this, where you do not have to use coding at all to create sticky elements. WP Sticky allows you to create sticky elements without any coding whatsoever. Below, we will explain all of its features and how it works.
WP Sticky – How it works

The first thing on the to-do list is installing and activating WP Sticky on your webpage. The plugins menu is on the left side of the WordPress user interface. Open the plugins menu, find WP Sticky, and tick the little box in the upper left corner once you have found it.
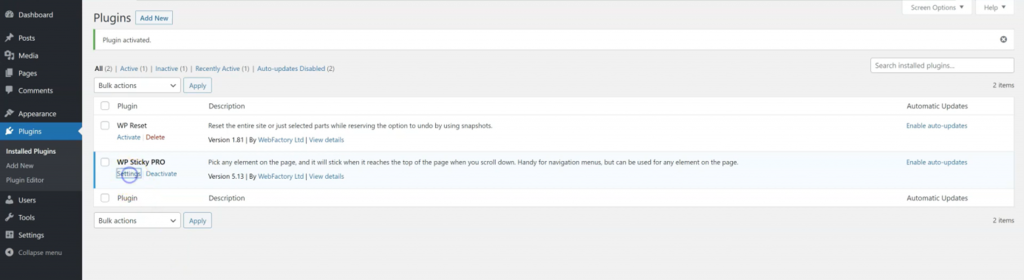
After that, you need to go to the „Settings“ menu of WP Sticky and click on the big yellow button that says „Add New Sticky Element“ ( say, a menu this time). The button is in the top left corner, below the name.
After clicking the button, a form will appear that needs to be filled out in order to set up your first sticky menu. The information needed is the name and the position of the sticky menu.

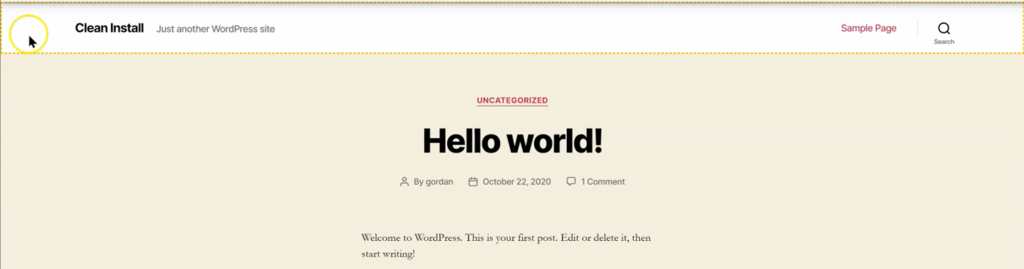
After filling out the form, you get to choose which part of your web page will be the sticky part. The sticky parts will be rounded with a yellow interrupted line around them. For example, you want to make a sticky menu. Firstly, you need to give a name to the sticky menu and then mark it on the webpage.
You can deactivate or reactivate the sticky menu on your webpage, so you can get both previews of what your web page will look like with and without the sticky menu.
If you want your menu to stick only on some screen sizes, you can do that as well. With the Z-index, you will get to control the sticky elements in case they are overlapping.
You can also add a fade-in or a scroll-down effect to your sticky elements, set the opacity, and set a scroll range for the same elements.
The advanced options allow you to modify your sticky elements depending on the number of pixels on the screen, add a push-up element, as well as choose where you want the element not to be sticky.
Features
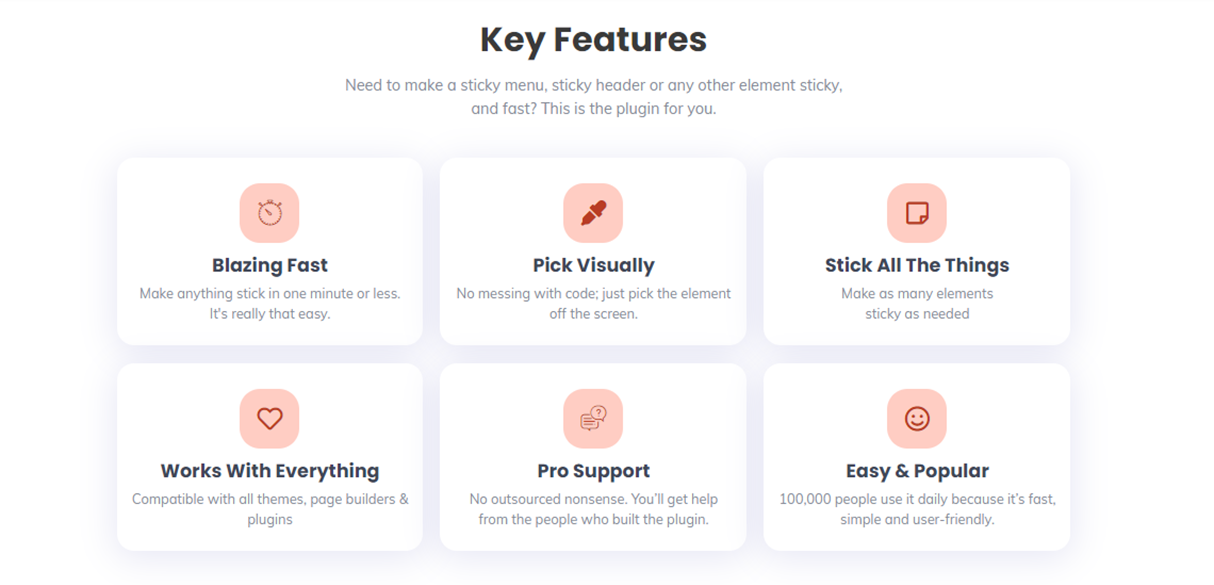
First of all, WP Sticky is programmed to be an easy solution to people that do not know to code but want to make and maintain a website. It is also very user-friendly. The whole process was described in three paragraphs.
You can pick and choose which element is going to be sticky by going to your website and clicking on the part that needs to be sticky.
Also, there is no limit on the number of sticky elements per webpage. You can make as many of them as you want. WP Sticky is compatible with all plugins, page builders, and themes, which means you can use it anywhere, anytime, on any page.
WP Sticky also offers professional support from people that are the creators of this plugin. You know that you can trust their responses. They know what they are talking about. They made it.
Last but not least, WP Sticky is fully responsive, and you can choose which elements of your webpage are going to stick on which devices.
Pricing
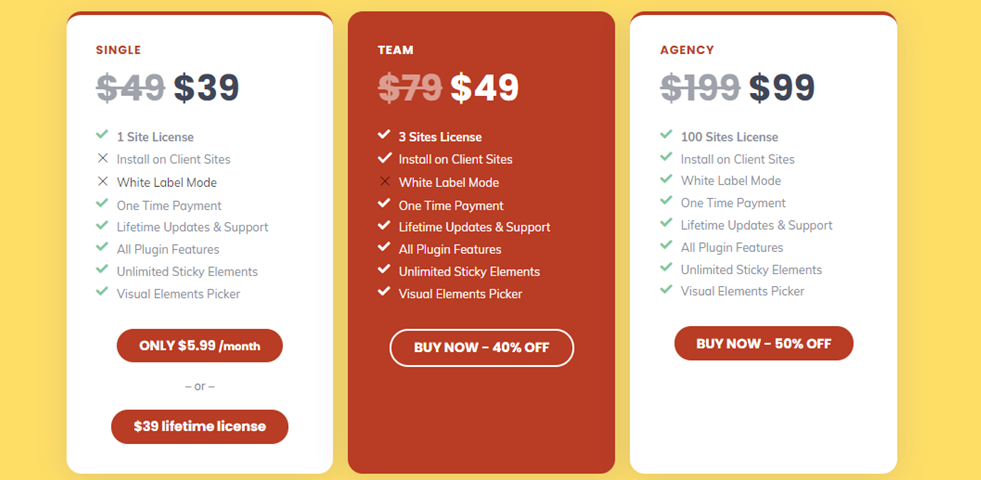
There are three price plans for WP Sticky, and we have to inform you that the plugin is currently on sale. The Single plan includes a license for one user, lifetime updates with full support. All of the above-named features are included for only 39USD as a one-time purchase.
The Team plan includes licenses for three users. WP Sticky can be installed on your clients’ websites, includes lifetime updates with full support. All of the above-named features are included, a limitless number of sticky elements, and a visual elements picker for only 59USD.
The last one, the Agency plan, includes licenses for a hundred users and the ability to install WP Sticky to your client’s websites. The Agency plan also includes a white-label mode, which means no one will ever know that you used WP Sticky at all. The price of the Agency plan is 99USD.
If you realize that WP Sticky is not the best option for you, you can get your money back within the first seven days of the purchase, no questions asked.
Final Thoughts
WP Sticky is a great plugin and a great alternative to coding. If you want to create sticky menus and other sticky elements, but you do not know how to code and what to do with the information given to you at the beginning of the article, just get WP Sticky. It is a great, coding-free solution for very little money.